

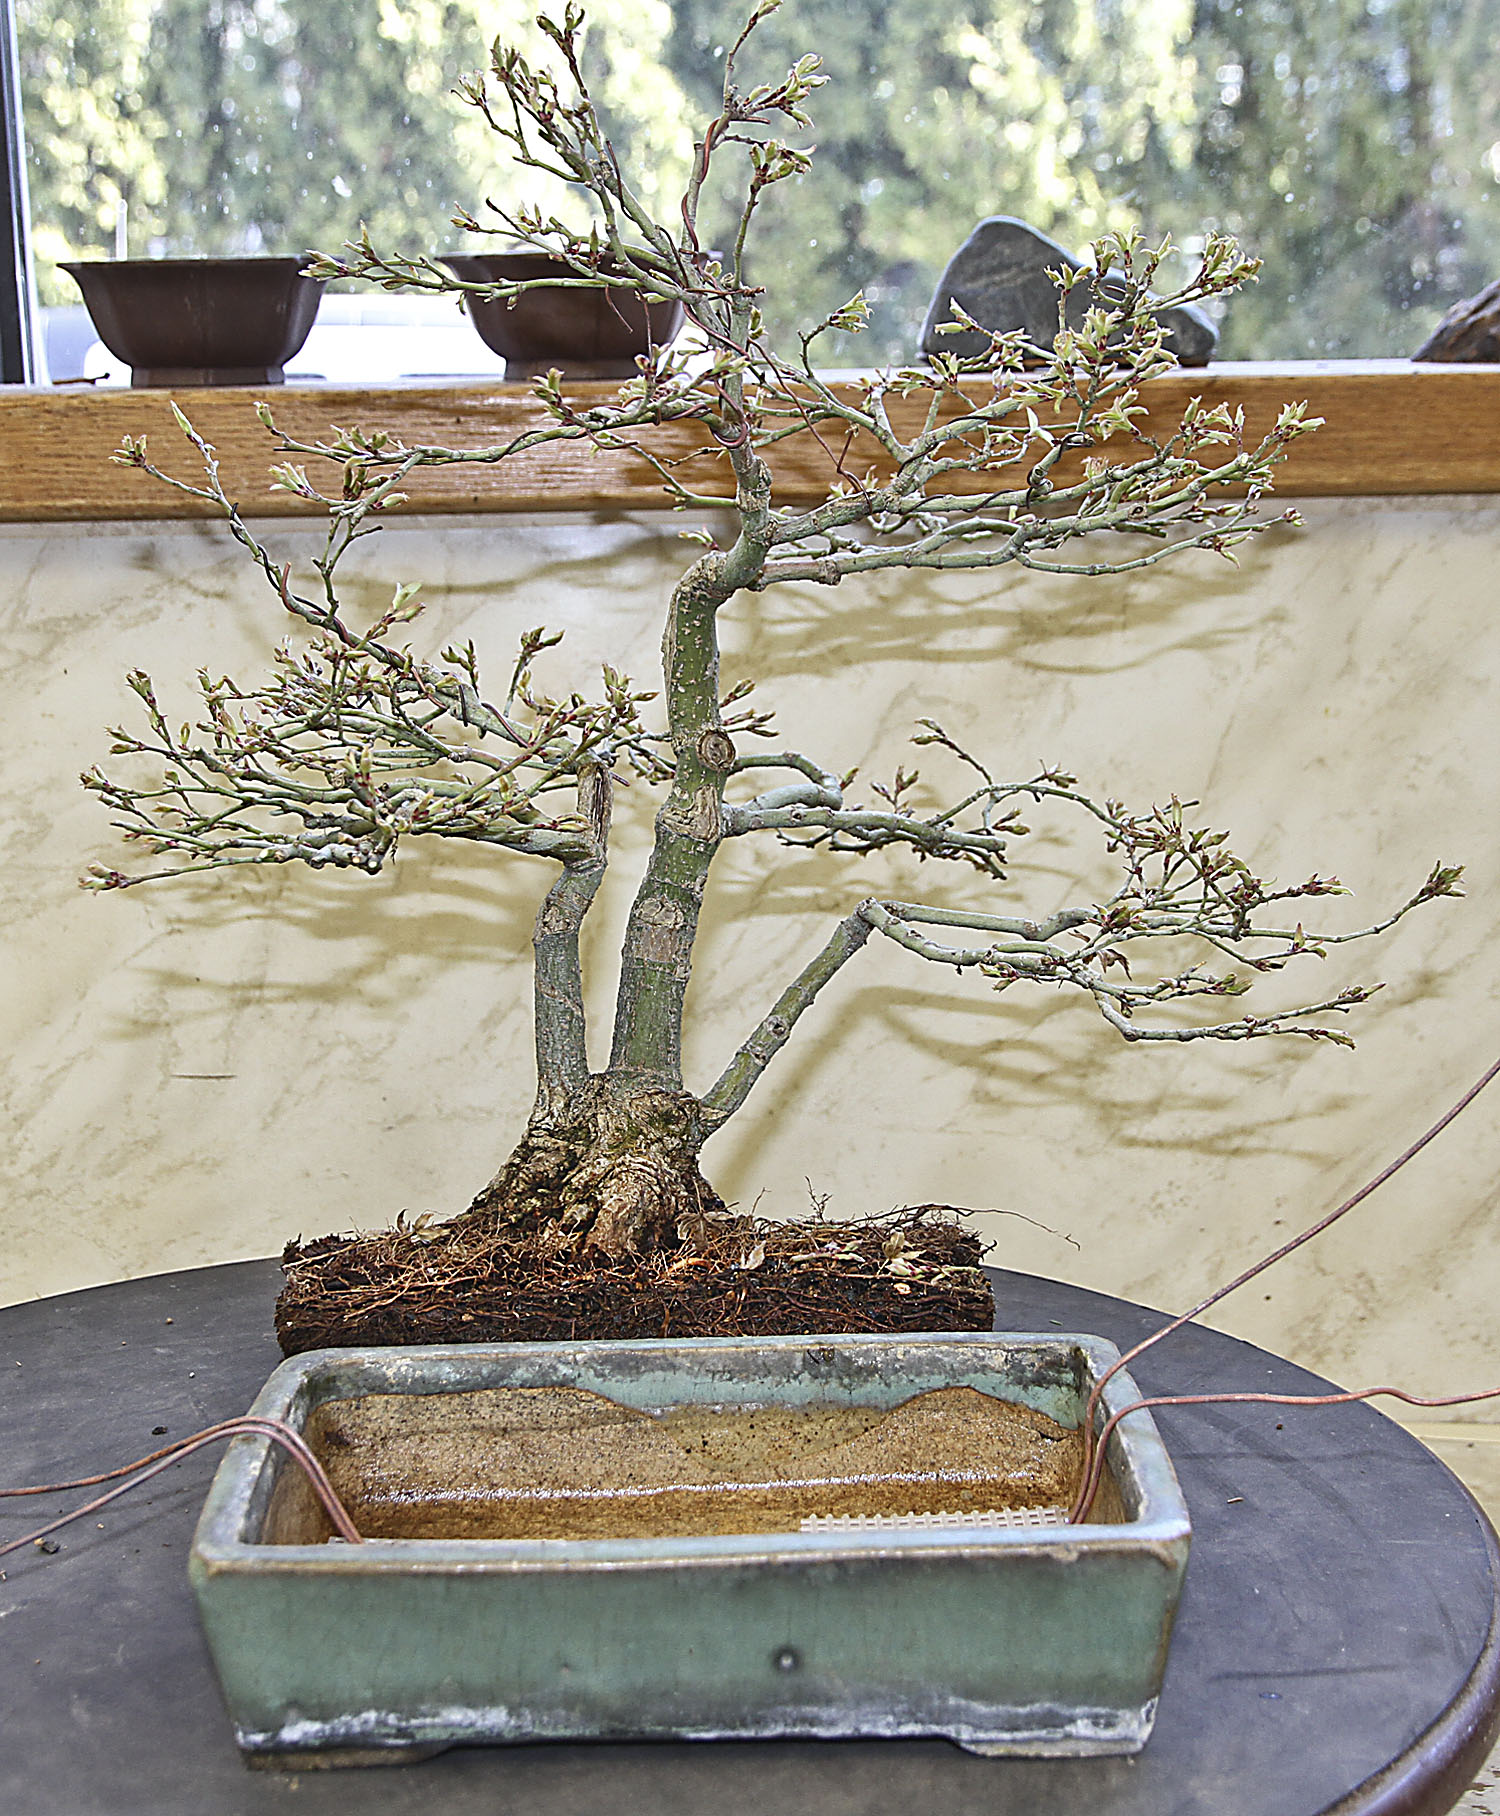
Although the temperature is still cold and snow piles remain, some deciduous bonsai need repotting because the buds are now beginning to open. These bonsai have been overwintered in the garage. My son Chris has been working on several cars and turned the kerosene heaters up a little to make it more comfortable than the 27F temperature I’ve been maintaining. So… many deciduous bonsai woke up a bit early this year.
Usually we transplant the deciduous species first, followed by the narrow leaf evergreens and finally the broadleaf evergreens. Additionally, I “try” to repot bonsai which are pot bound and difficult to water during the summer. Some of those bonsai have strong roots and the root pressure splits containers. Also the roots of pot bound trees often raise the soil level up higher than normal. All I need to do is to remember which trees drained slowly. I do not repot bonsai on a regular schedule, but rather when the trees tell me to. Transplanting too often disturbs growth and I’d rather wait a year (or two) before repotting. Some of my pines have not been transplanted in ten years. They grow slowly, have short needles and still drain well.

Bob preparing containers and soil mixes
The containers are prepared before the roots are worked
On Wednesday Bob Pfromm and Alan Adair helped me transplant. At one time we were working on five bonsai at the same time. I was trimming a bonsai; Bob was preparing the soil and containers for other bonsai, while Alan worked the roots of another. Most of the containers were matched ahead of time, while sometimes we prepared the roots and fit them into the containers to see how they looked. Usually we selected the right container first. And, it’s not unusual for us to have five or six excellent containers lined up for final selection. I made the final trunk positioning in the container and Bob and Alan finished up and mossed the soil surface.

This bonsai needed to but cut out of the container because of the slight incurving rim
As we were transplanting I thought of a few topics, which might help others while repotting. Students often ask why I use the large size long handle wire pliers. They say that they don’t have large trees so smaller size tools are better. However, in addition to providing additional leverage, the long handles allow hands to stay free from damaging tender branches.
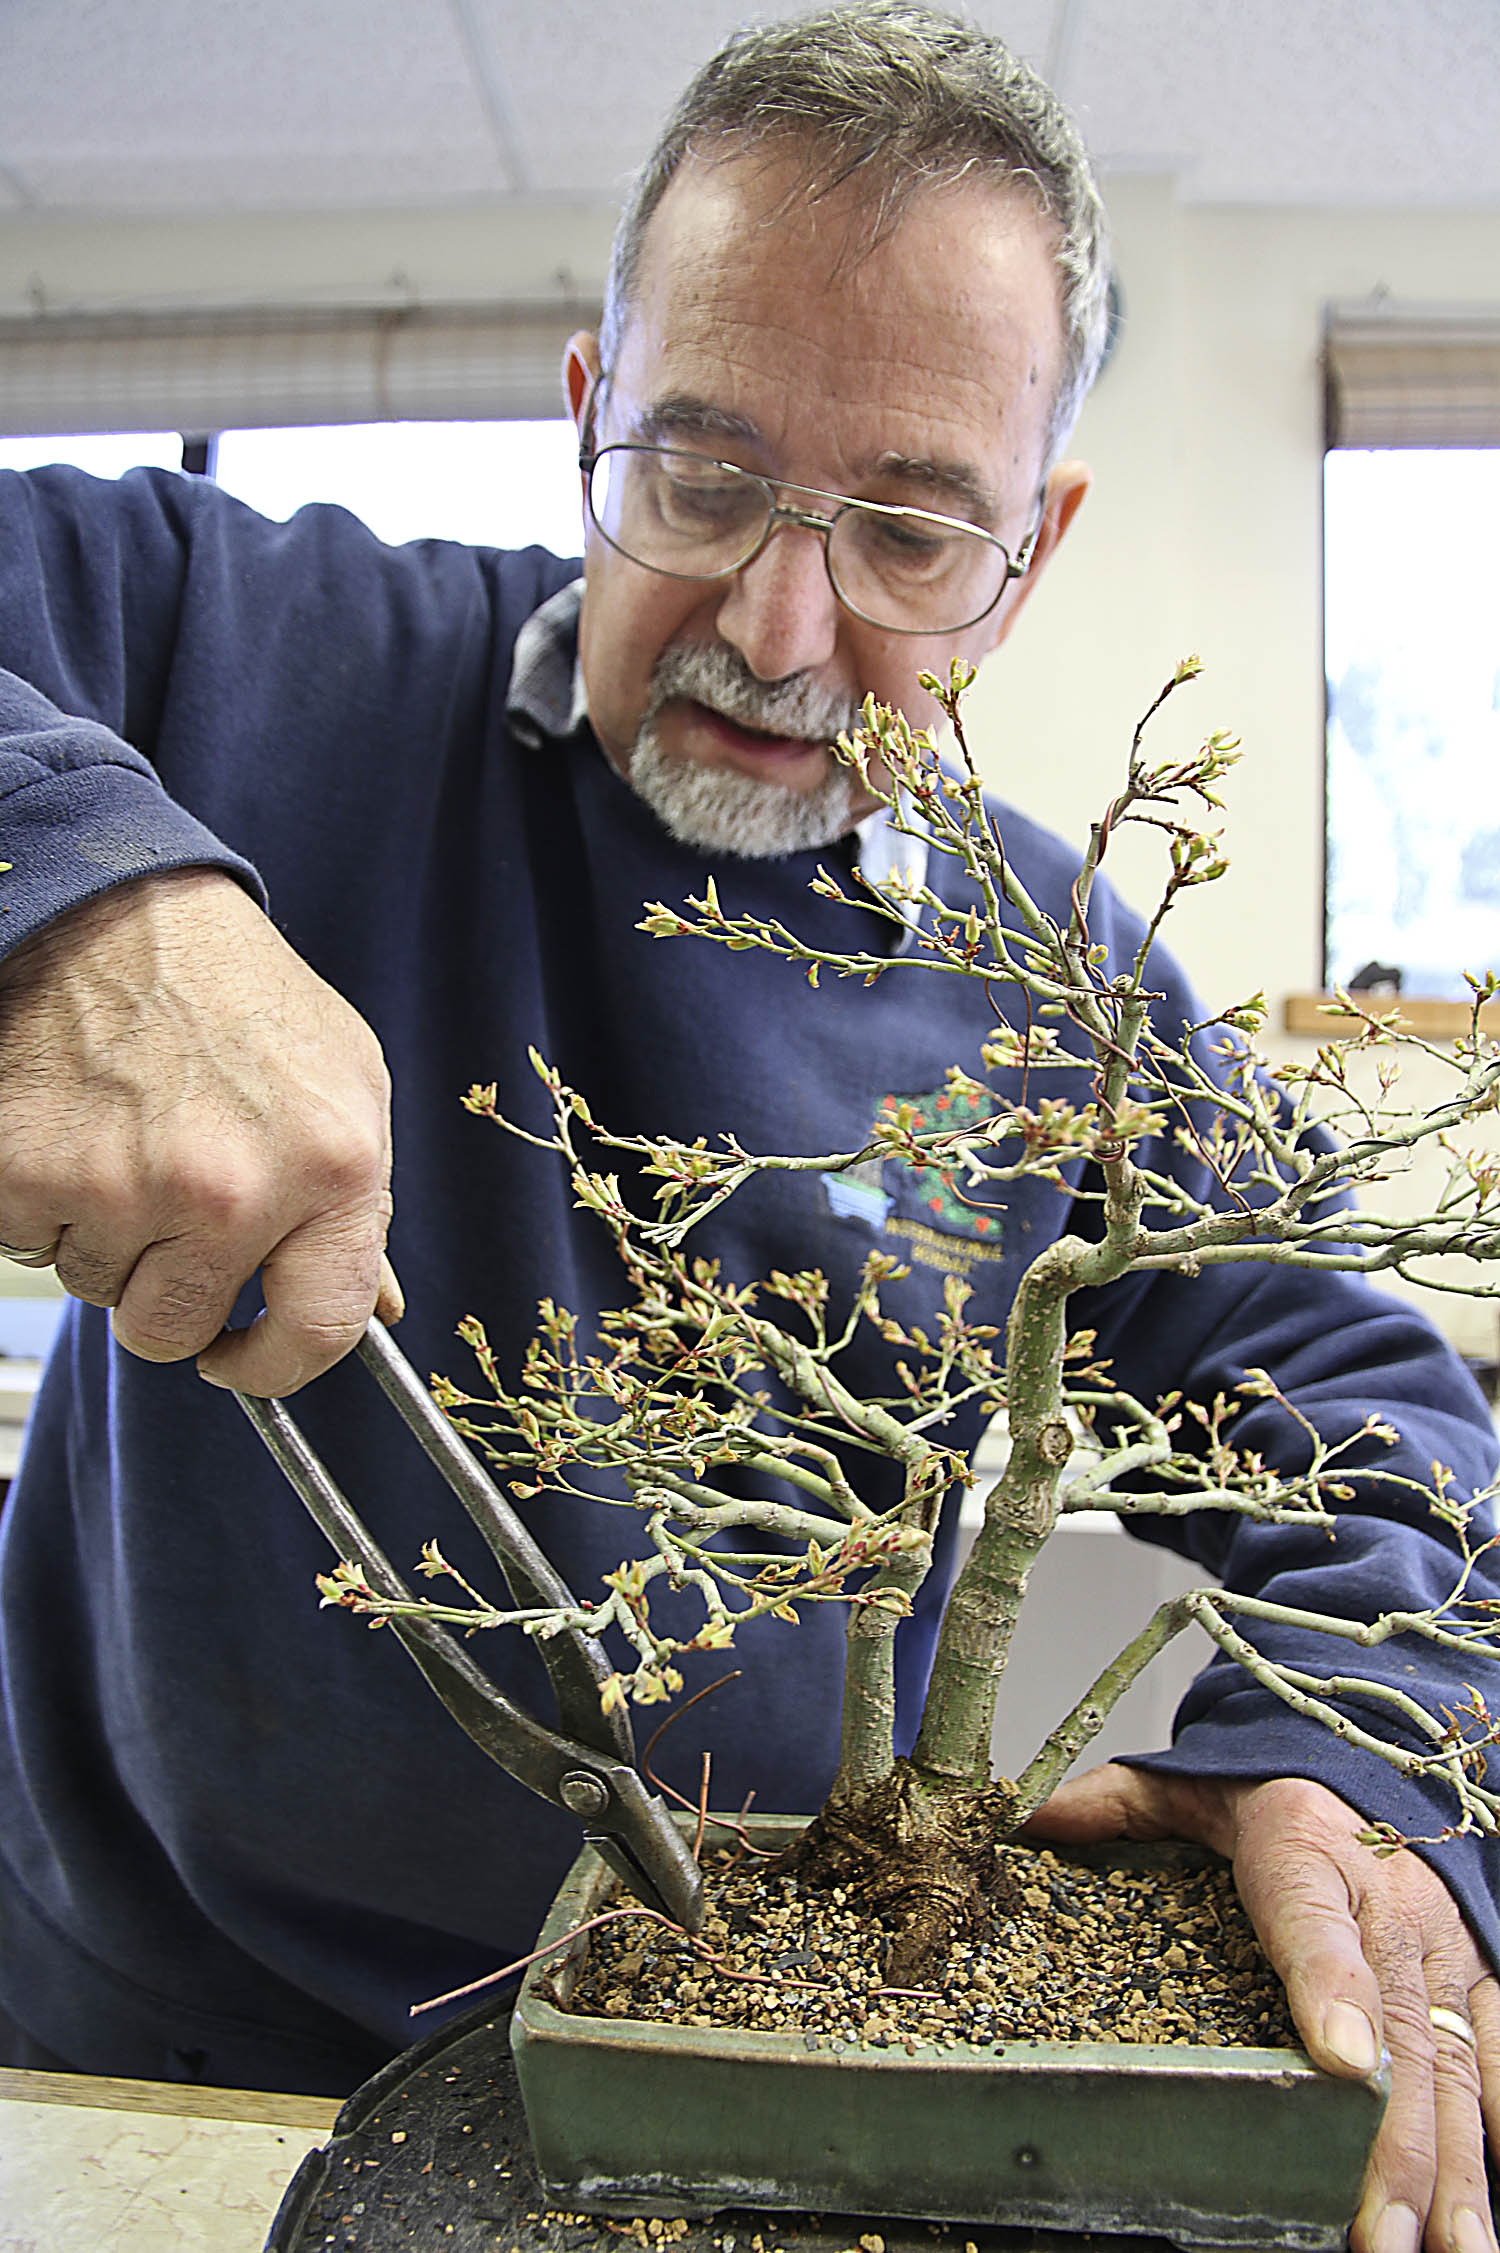
Long handle pliers provide leverage and allow hands to stay clear of the delicate branching

Euonymus, November 2011
My large Euonymus bonsai with rough bark is an unusual bonsai that is colorful in autumn with the coral colored fruit. It has been growing in a contemporary oval Chinese container for many years. Last spring it was transplanted into a smaller, much finer quality, rare, old Japanese container to make the trunk look more powerful for displaying in the 2013 Artisan’s Cup of Portland Bonsai Exhibition. The event was delayed until 2015 and the announcement came out after I transplanted the tree into the smaller container. It needed watering more often because of the smaller container. The container is quite special and originally came from Yuji Yoshimura’s father. It was broken over 30 years ago and I received it from a friend who had patched it up. He patched well, because it held together until last year. The root pressure pushed out and the container split apart.
Alan removing the tree from the old container

After trimming the tree Alan repotted it while the container fell into two pieces. We immediately wrapped the roots to prevent dehydration while the container was repaired. Alan used a two part epoxy cement with drainage screen as patches. The plant roots cannot detect colors (I think) so we used purple screening over the drainage holes to provide a festive mood.

After the container was repaired we began cleaning the trunk. For the past five decades I’ve used old toothbrushes to clean the bark of dirty trees. Most of my deciduous bonsai are cleaned yearly, especially before exhibits. In addition to removing algae, moss and other dirty things, the water cleans the trunk, which often permits dormant adventitious buds to freely grow through the old bark. In the past I used water with liquid dish soap and a few drops of Superthrive to clean the bark. Narrow leaf and broad leaf evergreens are washed more carefully than deciduous species. This year after trying out a friend’s new Japanese pressure sprayer made specifically for bonsai, actually satsuki azaleas, I splurged and purchased one from Japan. It works GREAT, but I can’t add dish soap or Superthrive because it might clog up the fine spay nozzle.


After experimenting a bit, I instructed Alan how to use the pressure sprayer. He spent over 35 minutes cleaning the bark of the old Euonymus bonsai. Afterwards he said he could have spent more time cleaning the bark. We finished, but will clean it well again next spring in preparation for display in the September 2015 Artisan’s Cup of Portland Bonsai Exhibition.

Bark before washing

Bark after washing

The transplanted Euonymus bonsai
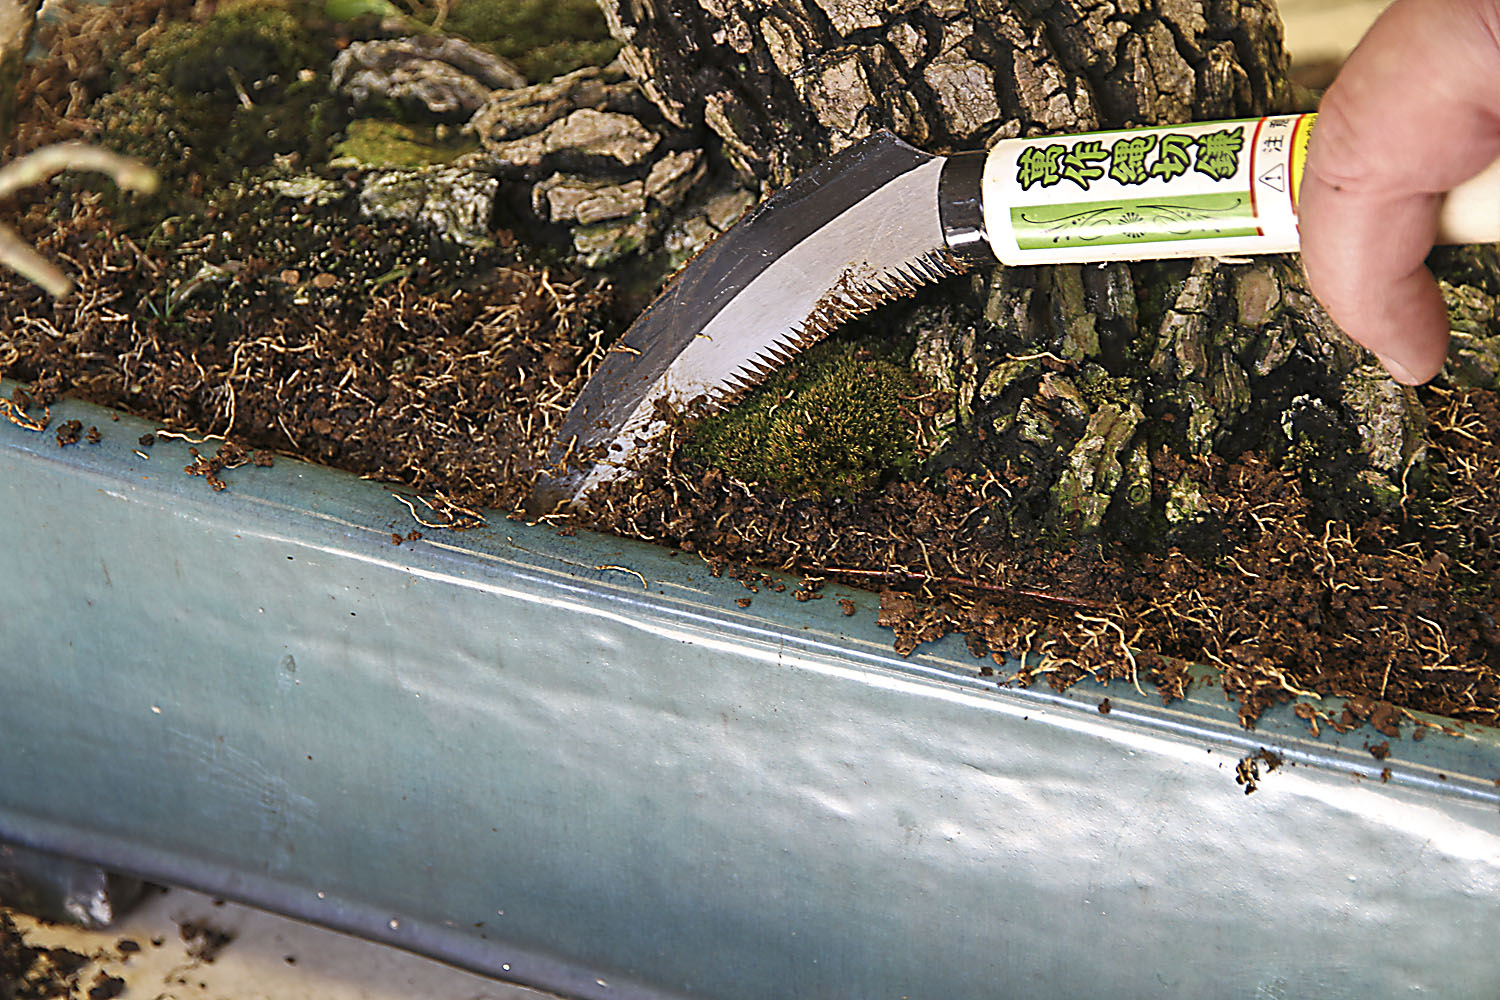
On Thursday Paul Eschmann joined Alan Adair and me to continue repotting. The large Trident maple from Dr. Andrews was pruned and potted using many tools including a power reciprocating Sawzall. This tools comes in quite handy when making a flat cut across the bottom of a root ball or for sawing through heavy roots.

Alan sawing roots while Paul carefully holds the tree to prevent damaging the branches

Combing the roots before trimming

Oto Hime Japanese maple bonsai, March 2011. This bonsai has two fronts.
In March 2011 I got an Oto Hime Japanese maple grown by Julian Adams during my annual spring southern lecture tour. By the time I got home the tree had leafed out and I did not feel comfortable potting it into a shallow container because I found several large heavy roots. Having grown in a deeper than normal bonsai container for three years the tree produced many fibrous feeder roots and we proceeded to repot it into a shallow container. This was a lot of work and required a couple of hours to completely repot the bonsai.


Trunk base before washing and pruning crossing roots


Heavy roots in the center of the root ball were hard

A chisel was used to hollow out heavy roots

Before washing

Washing root base

Crossing roots were revealed

A Masakuni chisel was used to simply remove the crossing root with one tap of a mallet

The remaining roots were washed with a forceful spray of a garden hose
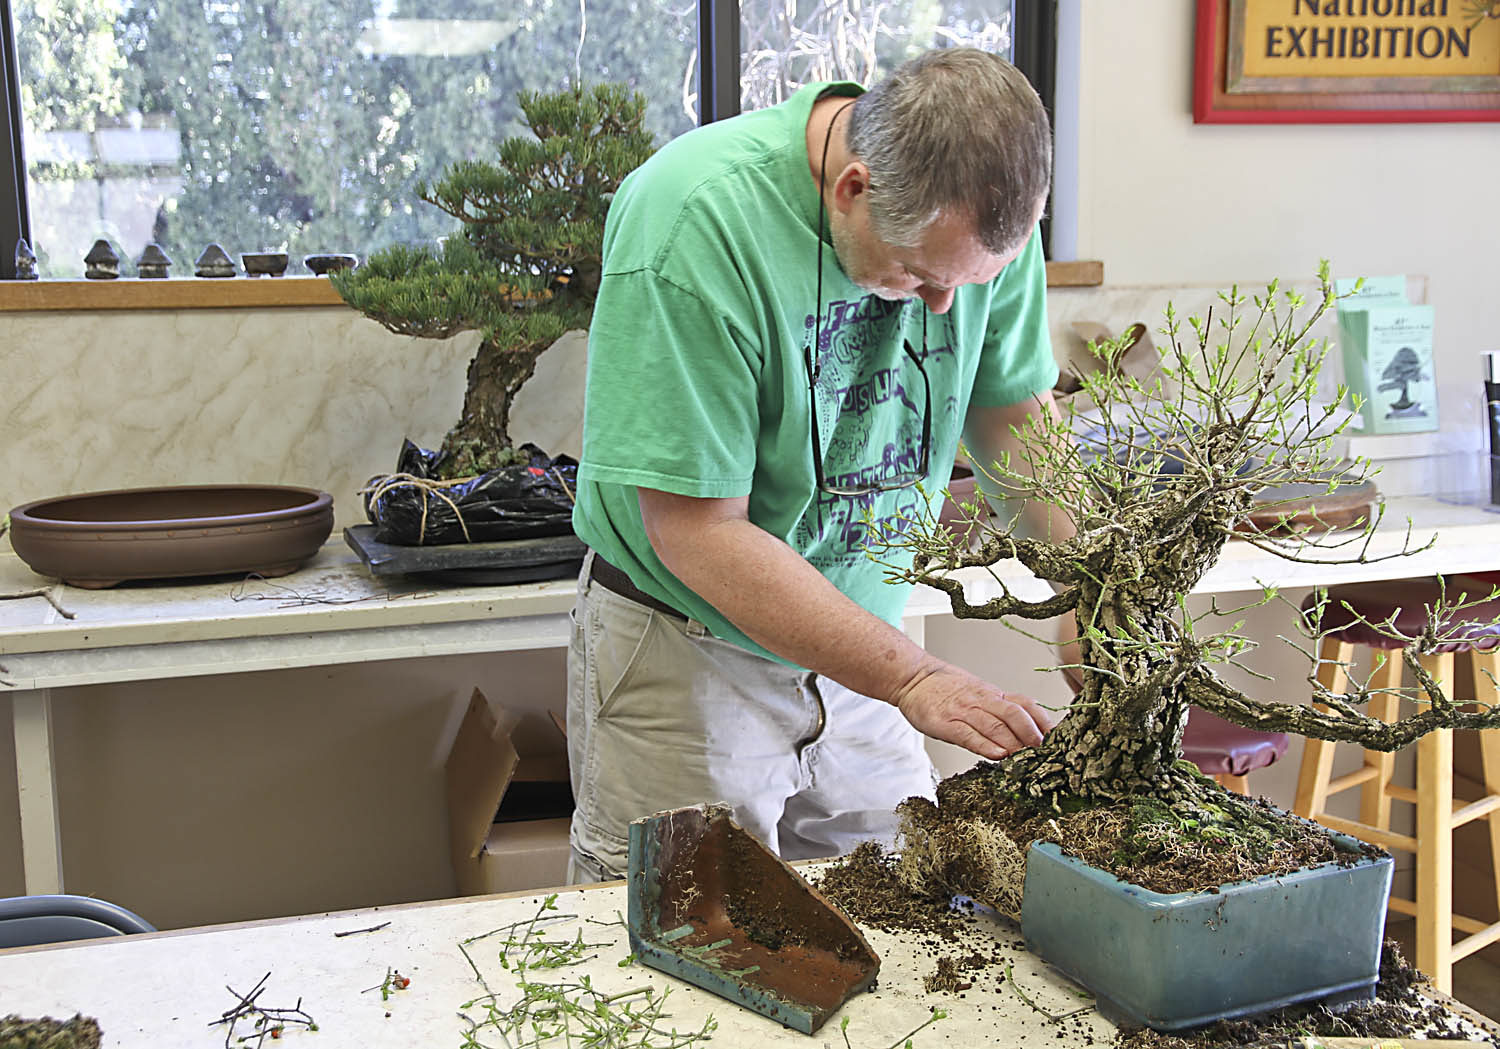
After I trimmed the branches of the Oto Hime Japanese maple bonsai Paul removed it from the container. Then Alan, Paul and I worked on the roots. Making a flat cut through the 2.5 inch root ball was a chore! The heavy roots in the center were old, hard and we needed to change the new Sawzall blade we started with. After we got through the root ball the tree would not sit properly in the new container. It rocked because a heavy root remained. I did not feel comfortable reducing the entire root ball any more so got out my handy Masakuni bonsai chisel and proceed to carve the heavy root. We reduced it quite a bit, but the tree still rocked, so we needed to chisel out a few more heavy roots before we got it to sit correctly at the proper depth. Over 12 different tools were used to repot this bonsai.

The newly repotted Oto Hime Japanese maple showing the “other” front
All of the newly repotted bonsai were thoroughly watered and place outside because the temperature was in the low 40sF. However the forecast was for lower temperatures so we put them into the garage for the evening. The low temperature for Wednesday evening was 25F. Although they would have been fine, it is better to be cautious and provide maximum aftercare. They will again go outside in the morning and probably go back inside for the evening. Thus the “Bonsai Dance” season begins. More on that activity later.
It was a busy two days transplanting several bonsai. After my friends left I still had the energy, drive and creativity to design four additional European beech forests for sale.
Great post really enjoyed
Reading it with the pictures to
Regards shah (uk)
Bill, working and taking photos of the work at the same time can be a pain. Thank you for taking that time for posting on your blog. It is always interesting to see how you accomplish your goals.